Introducing “Ramayana Dolls” – Relive the Epic Tale in Every Detail!
Embark on a journey into the heart of Indian mythology with this exquisitely crafted Ramayana Dolls collection. Immerse yourself in the timeless narrative of Lord Rama, Sita, Lakshmana, Hanuman, and other characters from the Ramayana, brought to life in the form of meticulously designed amigurumi dolls.
Each Ramayana Doll is a masterpiece of artistry, capturing the essence of the characters with intricate details and vibrant colors. In this blog post I am going to share a free written crochet pattern to make an amigurumi Rama.

Pattern Notes:
- Work in continuous rounds.
- Work through the entire stitch, rather than FLO or BLO.
- The instructions in brackets are to be repeated the number of times stated after the bracket.
- Count your stitches.
- Work tight.
Materials Needed:
- Hook: 2.25mm
- Yarn: 4ply cotton yarn in blue, and other colors as needed
- Safety eyes: 6.00 mm safety eyes
- Tapestry Needle
- Filling
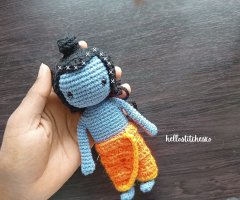
Ramayana Dolls-Amigurumi Rama
The amigurumi Rama Doll is a one-piece doll, which translates to no need for sewing anywhere. The legs and arms are attached as we crochet the body. Crochet the hair is separately and attach it to the body at the end. There’s a crochet-along video to help you throughout, which you can find here.
Arms
Make two of these arms.

- Magic Circle, 6sc (6)
- [2sc, 2sc, sc] * 2 times. (10)
- sc around. (10)
- [dec, sc, sc, sc] * 2 times. (8)
- to15. sc around. (8)
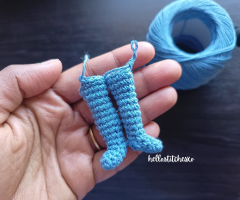
Legs
Make two of these legs. Please refer to this video to work the heel portion of the legs.
- Magic Circle, 6sc (6)
- [2sc, sc, sc] * 2times. (8)
- sc around. (8)
- sc around. (8)
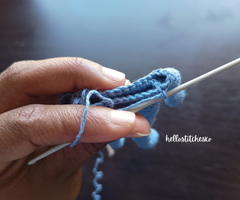
Start working the heel
Half-Row 5: sc, Turn, 3hdc, 1sl st, Turn (Leave 3sts unworked)
- Rnd 6: 3sc, sc[in-stitch], 3sc [FLO], sc (8)
- Rnd 7. to Rnd 8: sc around. (8)
- Rnd 9: [2sc, sc, sc, sc] * 2times. (10)
- Rnd 10. to Rnd 14: sc around. (10)
- Rnd 15: [2sc, sc, sc, sc, sc] * 2 times. (12)
- Rnd 16. to Rnd 17: sc around. (12)
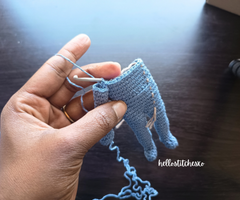
Join the legs
2sc, Ch 2, 4sc(previous), 12sc[leg1], Ch2, 10sc. (28)
Body
After joining the legs, start working the body.
- Rnd 1. to Rnd 7: sc around. (28)
- Rnd 8: [BLO] sc around. (28)
- Rnd 9 to Rnd 12: sc around. (28)
- Rnd 13: 10sc, 2sc[join arms], 13sc, 2sc[join arms], 1sc. (28)

Rnd 14: 10sc, 6sc[close arms], 13sc, 6sc[close arms], 1. (36)
- Rnd 15: sc around. (36)
- Rnd 16: 9sc, dec, dec, sc, dec, dec, 9sc, dec, dec, sc, dec, dec. (28)
- Rnd 17: 9sc, dec, dec, 11sc, dec, dec. (24)
- Rnd 18: 8sc, 3dec, 4sc, 3dec. (18)
- Rnd 19: dec, 4sc, 3dec, 2sc, 2dec. (12)
- Rnd 20: [sc, dec] * 4 times. (8)
- Rnd 21: sc around. (8)
Before working the decreases and closing the doll’s body, it is important to stuff the Rama doll tight. Make sure to stuff the shoulders tight to avoid droopy arms. I am not going to stuff the arms, but you can, if you prefer to do so.
Face
- [FLO] 2sc in each st around. (16)
- [sc, inc] * 8 times. (24)
- [sc, sc, inc] * 8 times. (32)
- [sc, sc, sc, inc] * 8 times. (40)
- to 8: sc around. (40)
Attach eyes between Round 8 & 9. Place the eyes while working Round 9.
Rnd 9: sc around. (40)
Count 9 stitches and place the first eye, then, crochet 9 more stitches and place the second eye. Please refer to this video to help with the eye placement.
- Rnd 10 to Rnd 13: sc around. (40)
- Rnd 14: [sc, sc, sc, dec] * 8 times. (32)
- Rnd 15: [sc, sc, dec] * 8 times. (24)
- Rnd 16: [sc, sc, dec] * 6 times. (18)
- Rnd 17: [sc, dec] * 6 times. (12)
- Rnd 18: [dec] * 6 times. (6)
Before working the decreases and closing the doll, it is important to stuff the Rama doll tight.
Hair
Use black yarn to make the hair.
- Rnd 1: Magic circle, 6 sc. (6)
- Rnd 2: inc in each st around. (12)
- Rnd 3: sc around. (12)
- Rnd 4: dec in each st around. (6)
- Rnd 5: 2sc in each st. (12)
- Rnd 6: [sc, inc] * 6 times. (18)
- Rnd 7: [sc, sc, inc] * 6 times. (24)
Now, work strands of hair into each of the 14 stitches from Round 7. There will be 10 stitches left which can be used to frame the forehead portion.
Make chain 10 into the stitch 1 & 2 and in stitch 13 & 14. The stitches in-between will have longer strands of hair covering the back portion of the head. Make chain 12 in those stitches. Work single crochet stitches into each of those chain strands.
Forehead: Ch2, skip 3, 1hdc, 2dc, 1hdc, ch 2, skip 2, sl st into the 3rd stitch. Finish off.
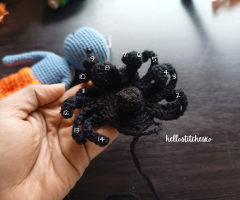
Now, it is time to sew the hair to Lord Rama’s head. Place stitches at the x mark on the image. A small stitch at the end of the strands of hair, leaving a small curl at the end is used to secure the strands to the head. There’s no need to sew all the way along the length of the hair.
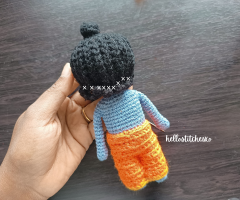
Dhoti Pants
Join yarn in desired color to make the dhoti in the unworked loop of Round 8 in the body. Dhoti is worked like how you would crochet rows, going back and forth.
- sc around. (28)
- Ch 1, 2hdc, 26hdc, 2hdc. Turn. (30)
- Ch 1, 2hdc, 29hdc. Turn. (31)
- Ch 1, 30 hdc, 2hdc. Turn. (32)
- Ch 1, 2hdc, 31 hdc. Turn. (33)
- Ch 1, dec, 30 hdc, 2 hdc. Turn. (33)
- Ch 1, 29 hdc, 2 dec. Turn. (31)
- Ch 1, 2 dec, 27 hdc. (29)
- Ch 1, skip 1, 24 hdc. (24)
Use a contrast color yarn to work single crochet edges on the dhoti.
Our Amigurumi Rama is almost done. Please refer to the video to make the ornaments and to add extra detailing to the face.
Bring the epic tale of the Ramayana into your life with these Ramayana Dolls. Share the rich cultural heritage of the Ramayana with the children in your family with this cute Amigurumi Rama. The pattern to make Lakshmana is similar to Rama except for some minor changes. Please follow us on Facebook and Instagram. Subscribe to our Youtube channel for more videos.