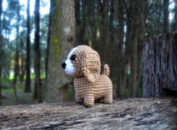
The look of tiny knit dress on amigurumi toys whether it was crocheted/knit is to die for. Especially if you are a crocheter and you are having a hard time trying to figure out how to knit tiny dresses, this free pattern is the one for you.

You will need to know how to cast on, knit & purl and how to cast off. You can learn the increase and decrease stitches as you go.
There are two ways that you can knit these tiny dresses
- Knit Raglan Dress: This is the knitting top-down approach. Start by casting on stitches to fit the neck of your toy. Then make some raglan increases for the sleeves. Join the front and back portion to complete the bodice. Finally make increases for the skirt, and simple stockinette stitches all the way till the length of the skirt.
- Knit Bottom-up: This is another simple approach that might suit a beginner. Start by casting on stitches for the bottom portion of the skirt. Then work stockinette stitches till the length of the skirt. Make decreases to make the waist portion of the skirt and cast off. Now pick up stitches and knit to make the front, back left and back right bodice pieces of the dress accordingly. The only disadvantage of this approach would be the number of yarn tails you will have to weave in at the end.
Method 1: Knit Raglan Dress for Amigurumi
Abbreviations:
- PM – Place Marker
- SM – Slip Marker
- K – Knit
- P – Purl
- K2tog – Knit two together
- M1 – Make one increase
Start to knit dress at the neck, follow raglan increases to do the yoke:
Cast on 20 stitches
Row 1-2 : Knit two rows of garter stitch.
Row 3 : P4, PM, P3, PM, P6, PM, P3, PM, P4. (20)
If you would like to add a button hole while knitting,
Row 4 : K1, Yarn Over, K2tog, KFB, SM, KFB, K, KFB, SM, KFB, K4, KFB, SM, KFB, K, KFB, SM, KFB, K3 (28)
If not,
Row 4 : K3, KFB, SM, KFB, K, KFB, SM, KFB, K4, KFB, SM, KFB, K, KFB, SM, KFB, K3 (28)
Row 5 : P5, SM, P5, SM, P8, SM, P5, SM, P5. (28)

:
Repeat the increases at Row 4 & Row 5 continuing till Row 10 & Row 11
:
Row 10 : K6, KFB, SM, KFB, K7, KFB, SM, KFB, K10, KFB, SM, KFB, K7, KFB, SM, KFB, K6 (52)
Row 11 : P8, SM, P11, SM, P14, SM, P11, SM, P8. (52)
Separating sleeves from the next row,
Row 12 : K8, Purl Cast Off 11 sts, K14, Purl Cast Off 11 sts, K8. (30)
Row 13 : Purl (30)
Row 14 : [K1, M1] till the end. (59)
Row 15 : Purl (59)
If you would like to make a bigger skirt
Row 16 : [K2, M1] till the end.
If not,
Continue in stockinette after Row 15 till the end of the skirt.