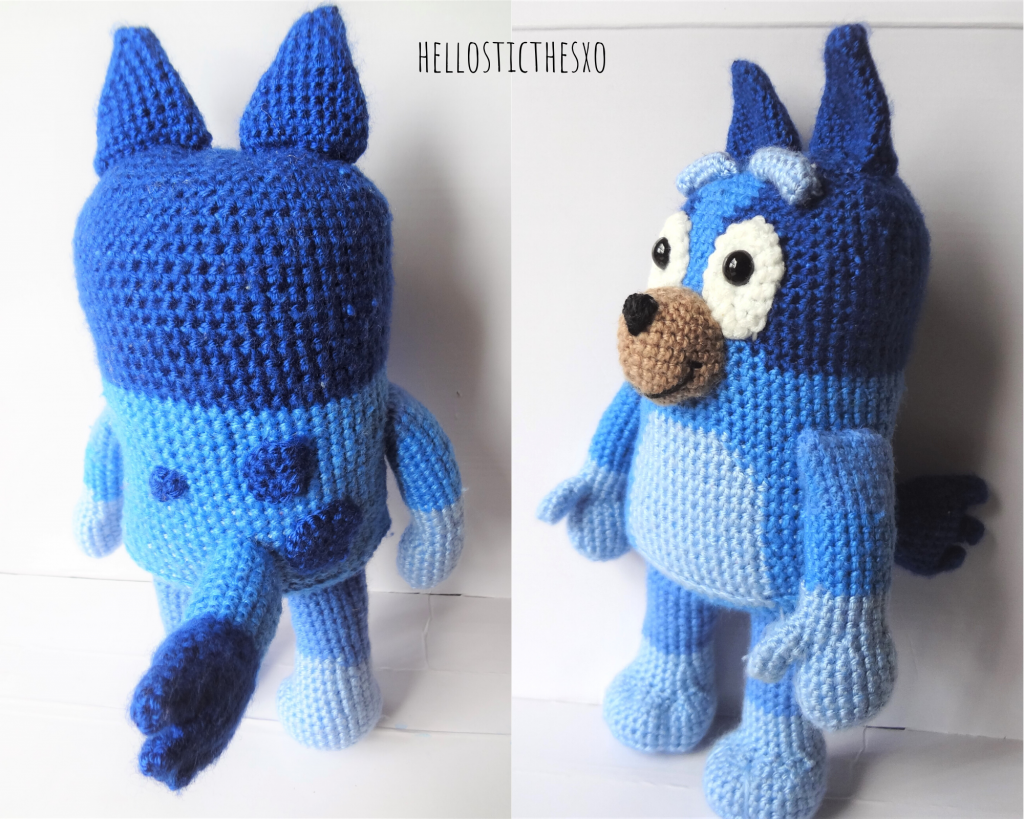
Hello fellow exhausted parents, how have you been? If you are in Australia, yes we are all ABC kids fans by now. My daughter is 3 years old and she still likes The Wiggles and Emma a little bit more than Bluey.
I like Bluey. (Edited to add: Now my daughter likes them a lot more than me) I binge watched a few episodes while making this Bluey amigurumi toy. My favorite episode is ‘keepy uppy’, laughed so much while watching it. If you are in the same train as I am, let me know in the comments your favorite Bluey episode.
I made this Bluey amigurumi toy for my friends daughter, and now my girl wants it. Has it happened to you as well? I have to make another Bluey and do some pattern testing on the way.

Pattern notes
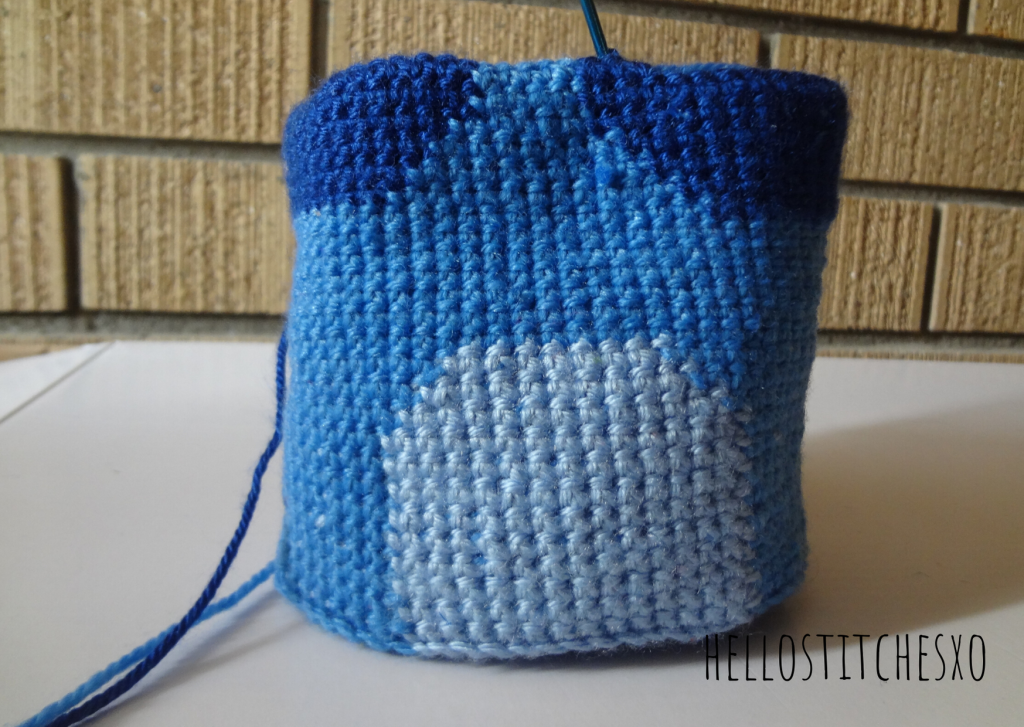
The Bluey toy is worked in continuous rounds without joining, unless specified otherwise. The base is worked in ovals, and worked upwards like how you would do a tapestry crochet purse to accommodate the color changes. So, you have to crochet over the other yarn when you are using one yarn. Always change colors, in the middle of the stitch to make it appear seamless. Most importantly keep it tight to avoid the other color showing through.
Glossary
- ch = chain stitch
- st = stitch
- sc = single crochet
- inc = increase (2sc in one stitch)
- invdec = invisble decrease (2sc together)
- sl st = slip stitch
Yarns & Hooks
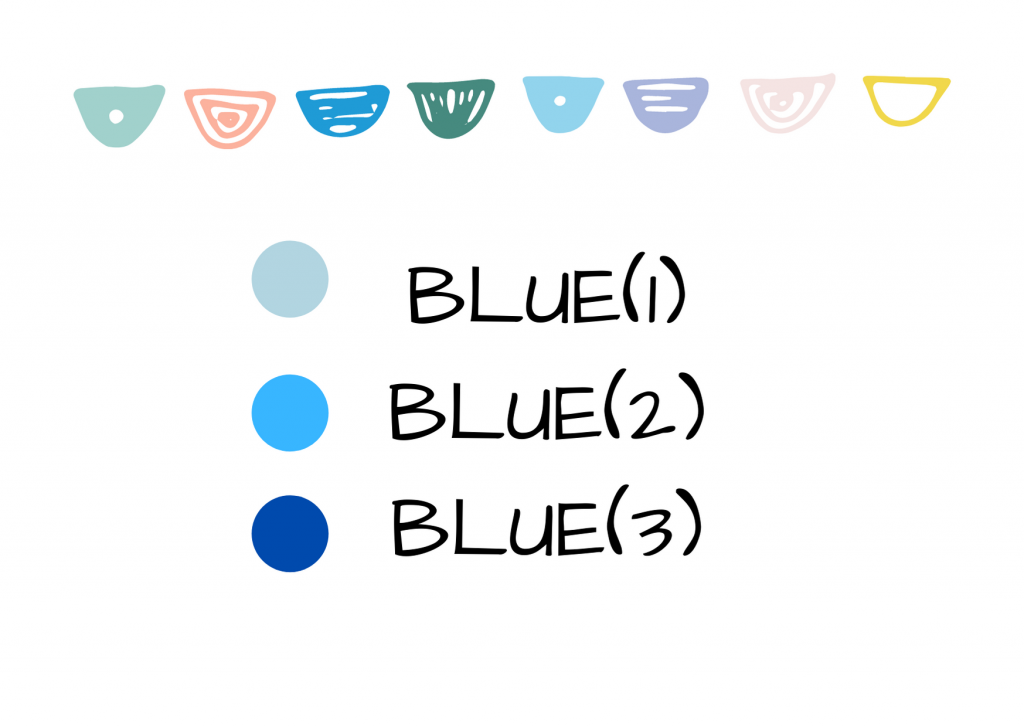
Three different shades of blue. I had a blue base color for Bluey already in my stash. And, I’m afraid I may not be able to give you the right yarn for that. I got my other two colors from Big W.
Light blue – Carnival soft 8 ply Shade : 2541
Dark blue – Carnival soft 8 ply Shade: 1485
Hook : 2.5mm
Safety eyes : 12mm
Tapestry needle and Fiberfill.
Bluey amigurumi body
Video help to make the base:
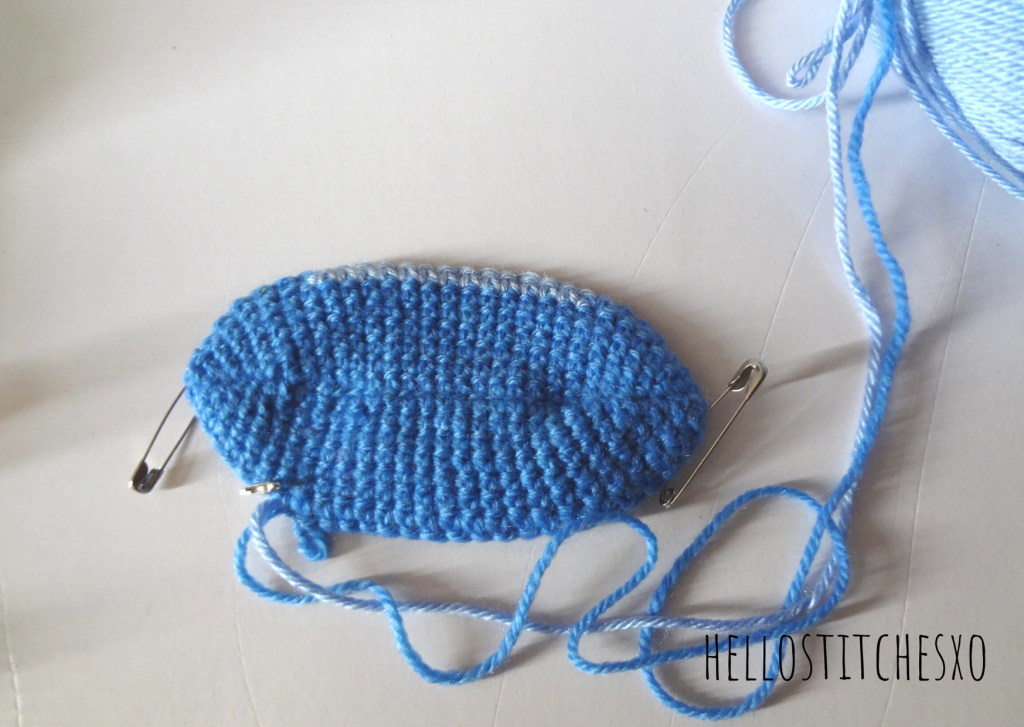
Foundation Chain: Chain 18.
Round 1: In the second chain from the hook,
- 3sc inc a) Mark the first stitch with a red stitch marker b) Mark the next stitch with a blue marker to make the increases.
- sc in the next 15 ch.
- 3sc inc and mark the middle stitch with blue marker to indicate the increase for the next round.
- sc in the next 15 ch. Now without joining carry on to the next round.
Round 2: Start the next round,
- sc in the chain marked with red marker and switch red marker to this chain making it as the beginning of this round.
- sc till you reach the ch marked with blue marker.
- 3sc inc the one marked with blue marker and changing the blue marker to the middle sc of the increase, thereby marking it for the increase in the next round.
- Sc in each st across till you reach the blue marker again.
- Now, 3sc inc in the stitch marked with blue and change the marker to point to the middle stitch for increase in the next round. Sc in all the stitches till you reach the end of the round.
Repeat instructions from Round 2, for all rounds till you reach Round 6. Follow the table and graph to help you understand better.
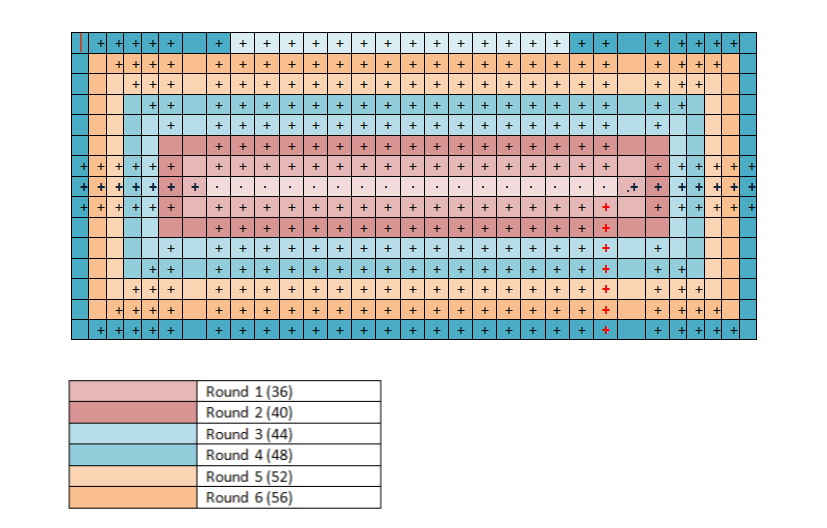
Round 7:
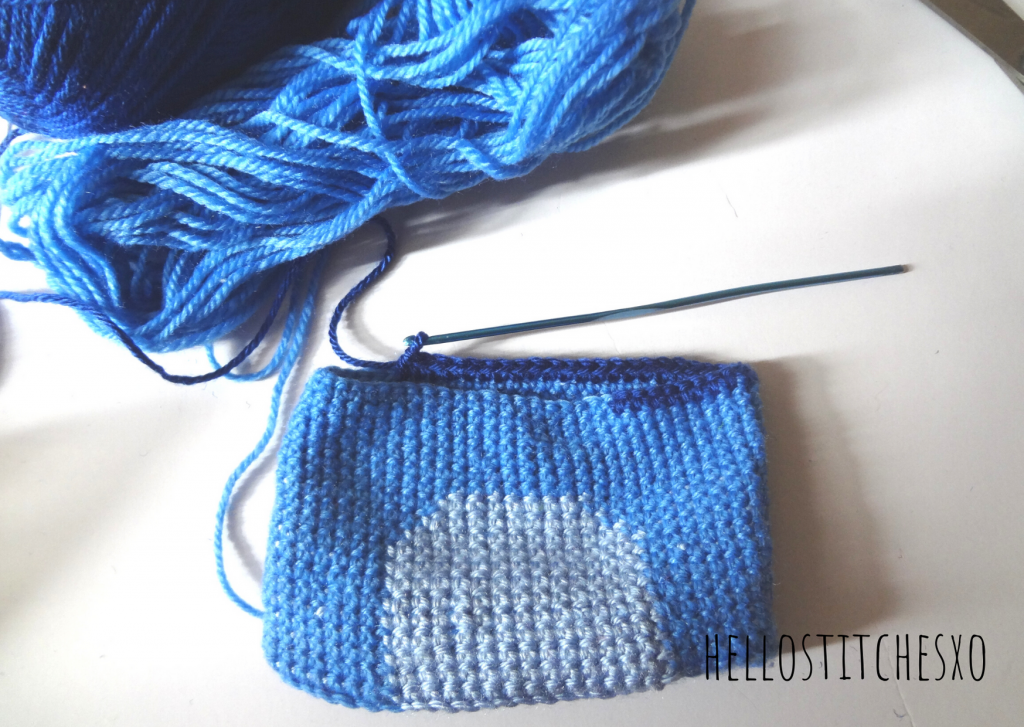
sc till blue marker. 3sc inc, continue to sc till you reach the 17th stitch, when you change to light blue yarn for the tummy. 14sc, and change to dark blue and complete the round.
Round 8:
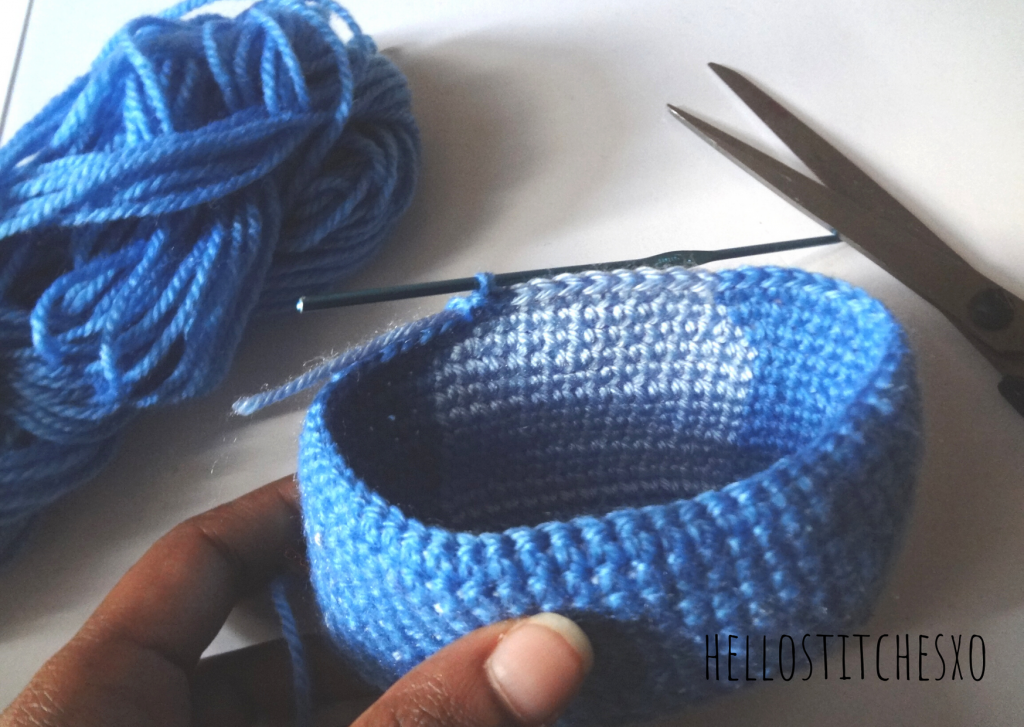
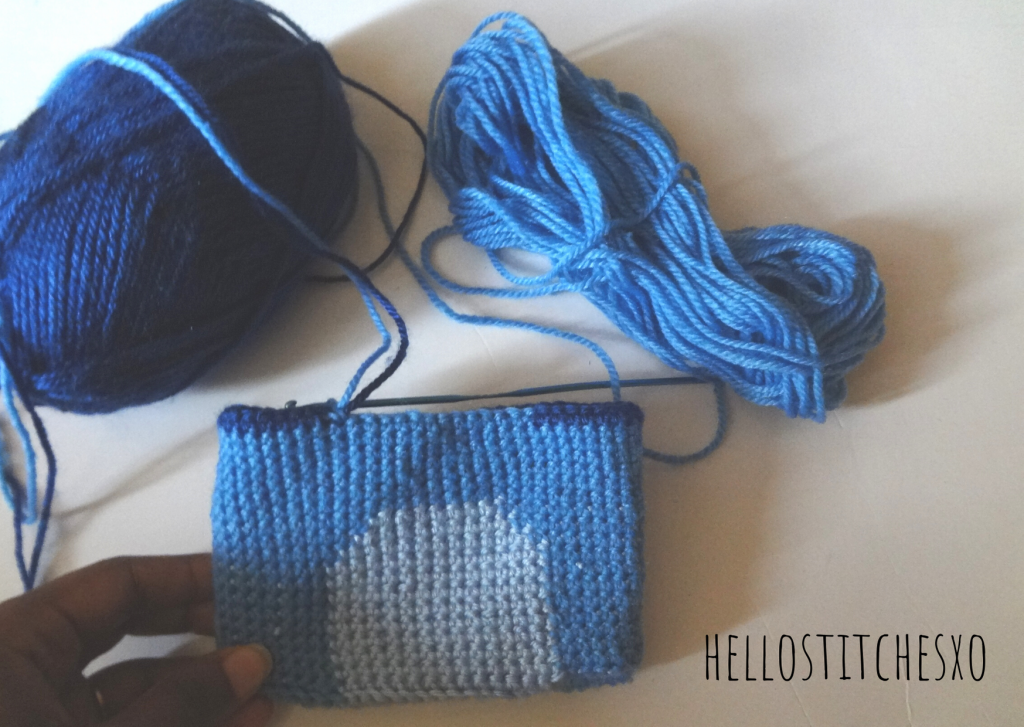
sc around, in back loops only. Making sure you follow the color changes according to the graph. Starting from this round on, tapestry crochet following the color changes in the graph.
Video help to make Bluey’s body:
Rnd 1-8 : 16 BLUE(2) | 14 BLUE(1) | 30 BLUE(2)
Rnd 9 : 17 BLUE(2) | 13 BLUE(1) | 30 BLUE(2)
Rnd 10 : 18 BLUE(2) | 11 BLUE(1) | 31 BLUE(2)
Rnd 11 : 19 BLUE(2) | 9 BLUE(1) | 32 BLUE(2)
Rnd 12-17 : 60 BLUE(2)
Rnd 18 : 31 BLUE(2) | 29 BLUE(3)
Rnd 19 : 17 BLUE(3) | 13 BLUE(2) | 30 BLUE(3)
Rnd 20 : 18 BLUE(3) | 11 BLUE(2) | 31 BLUE(3)
Rnd 21 : 19 BLUE(3) | 9 BLUE(2) | 32 BLUE(3)
Rnd 22 : 20 BLUE(3) | 7 BLUE(2) | 33 BLUE(3)
Rnd 23-27 : 21 BLUE(3) | 6 BLUE(2) | 33 BLUE(3)
Rnd 28 : 21 BLUE(3) | 7 BLUE(2) | 32 BLUE(3)
Rnd 29-32 : 20 BLUE(3) | 9 BLUE(2) | 31 BLUE(3)
After you have done all the 32 rounds, finish off by doing invdec in the ends. The decreases are done only in the corners like how we did the base. To be honest the body skews a bit, but I have tried to accommodate that in the graph, and in the end it is barely noticeable.
Bluey amigurumi feet and legs
Click the link for more detailed instructions and photos to make Bluey’s paws and arms.
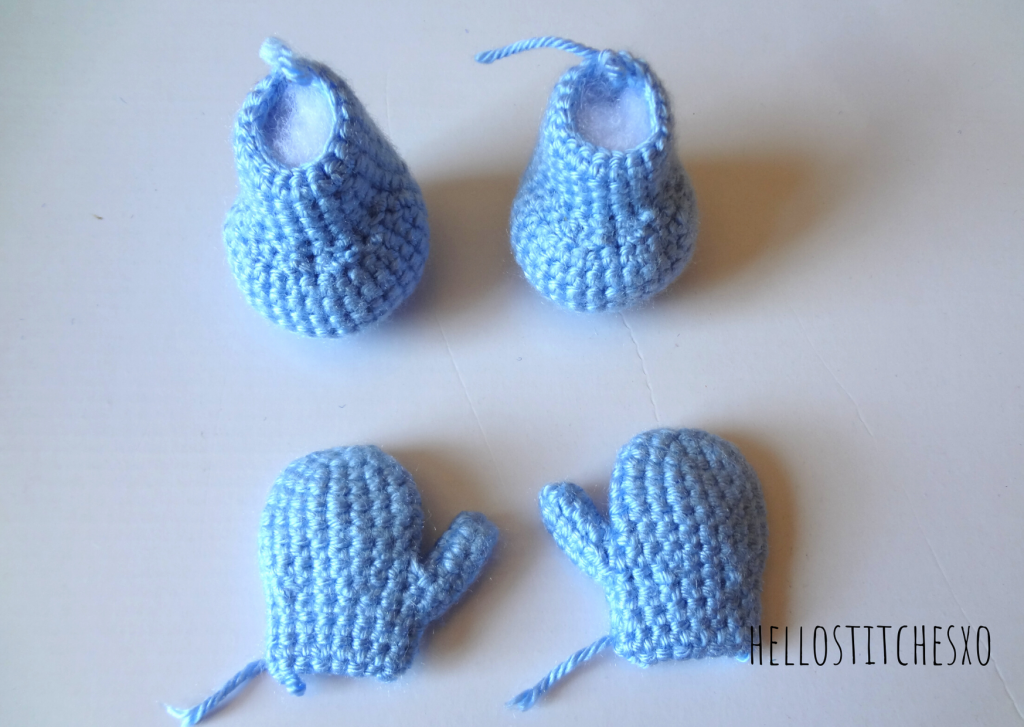
Round 1: Magic circle, 6sc in it. (6)
Round 2: 2sc in each sc around. (12)
Round 3: [sc, inc] * 6 times. (18)
Round 4: [sc, sc, inc] * 6 times. (24)
Round 5: [sc, sc, sc, inc] , [hdc, hdc, hdc, hdcinc] * 4 times, [sc, sc, sc, inc] (30)
Round 6: Sc around. (30)
Round 7: sc around. (30)
Round 8: sc around. (30)
Round 9: sc around. (30)
Round 10: 5sc, [sc, invdec] * 6 times, 7sc. (24)
Round 11: 5sc, [sc, invdec] * 4 times, 7sc. (20)
Round 12: sc around. (20)
Round 13: sc around. (20)
Round 14: sc around. (20)
Round 15: sc around. (20)
Change to the dark blue yarn that matches the body color
Round 16: sc around. (20)
: (sc in all 7 rounds in between)
Round 24: sc around. (20) Finish off.
Bluey amigurumi arms
Thumb: (Make two of these)
Round 1: Magic circle, 6sc in it. (6)
Round 2: 6sc. (6)
Round 3: sc around. (6)
Round 4: sc around. (6)
Palm: (Make two of these)
Round 1: Magic circle, 6sc in it. (6)
Round 2: 2sc in each sc around. (12)
Round 3: [sc, inc] * 6 times. (18)
Round 4: sc around. (18)
Round 5: sc around. (18)
Round 6: sc around. (18)
Round 7: sc around. (18)
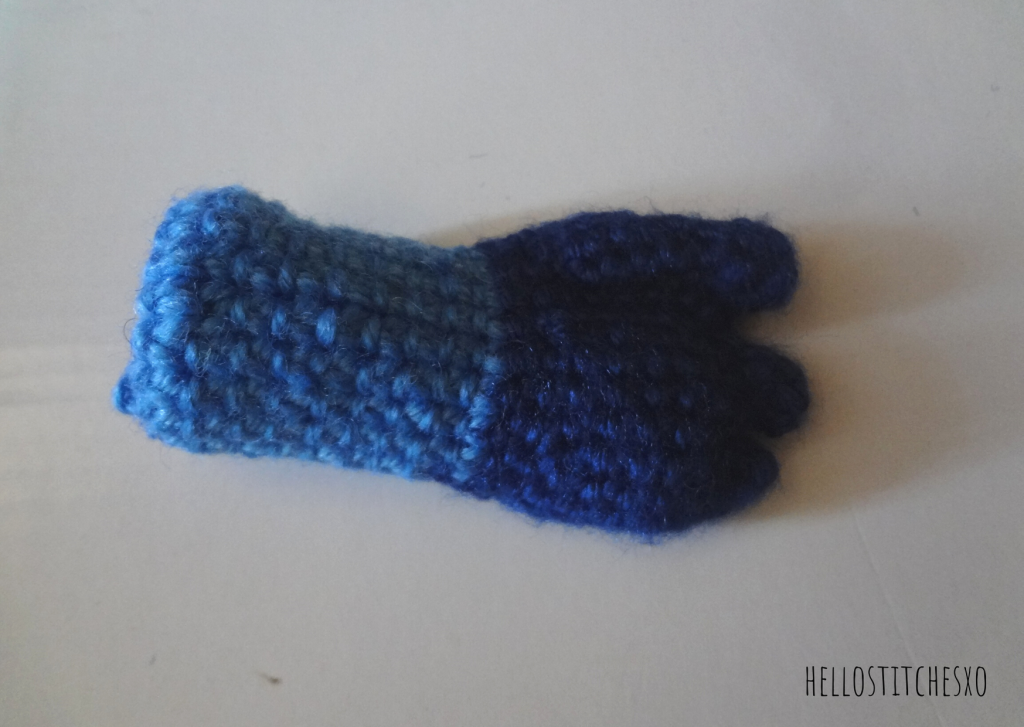
—-> If you are making the left arm attach the arm where it has to go. Attach it on the opposite side for the right arm.
Round 8: Join the thumb, 6sc around, 18sc around. (24)
Round 9: sc around. (24)
Round 10: [sc, sc, invdec] * 6 times. (18)
Round 11: sc around. (18)
Change to the dark blue yarn that matches the body color
Round 12: sc around. (18)
: (sc in all 11 rounds in between)
Round 24: sc around. (18) Finish off.
Bluey amigurumi tail
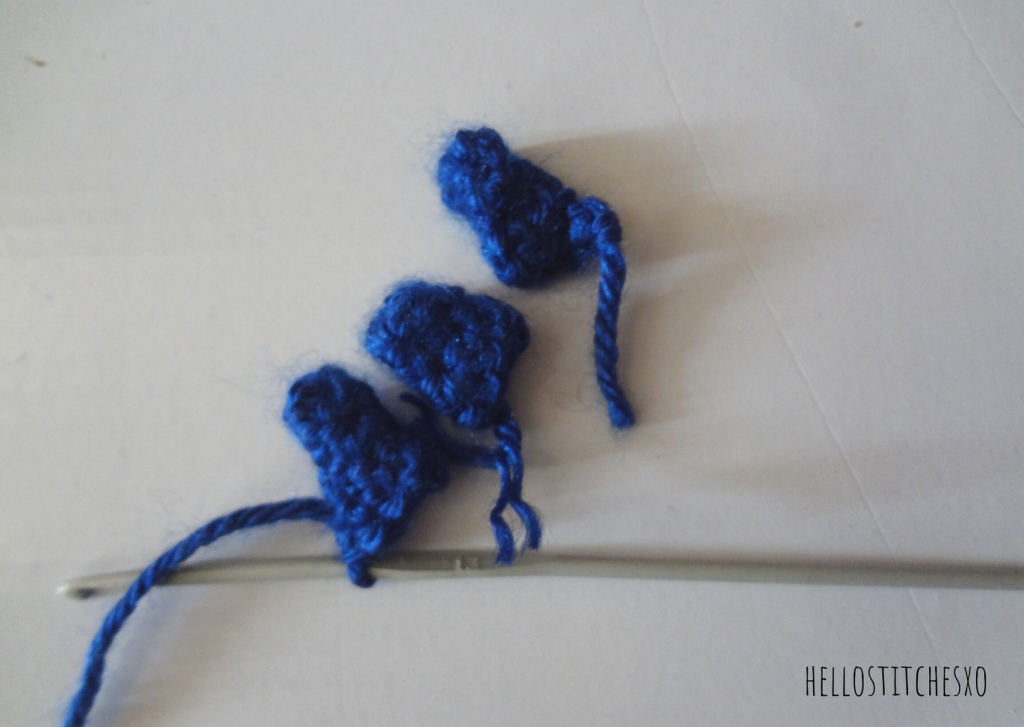
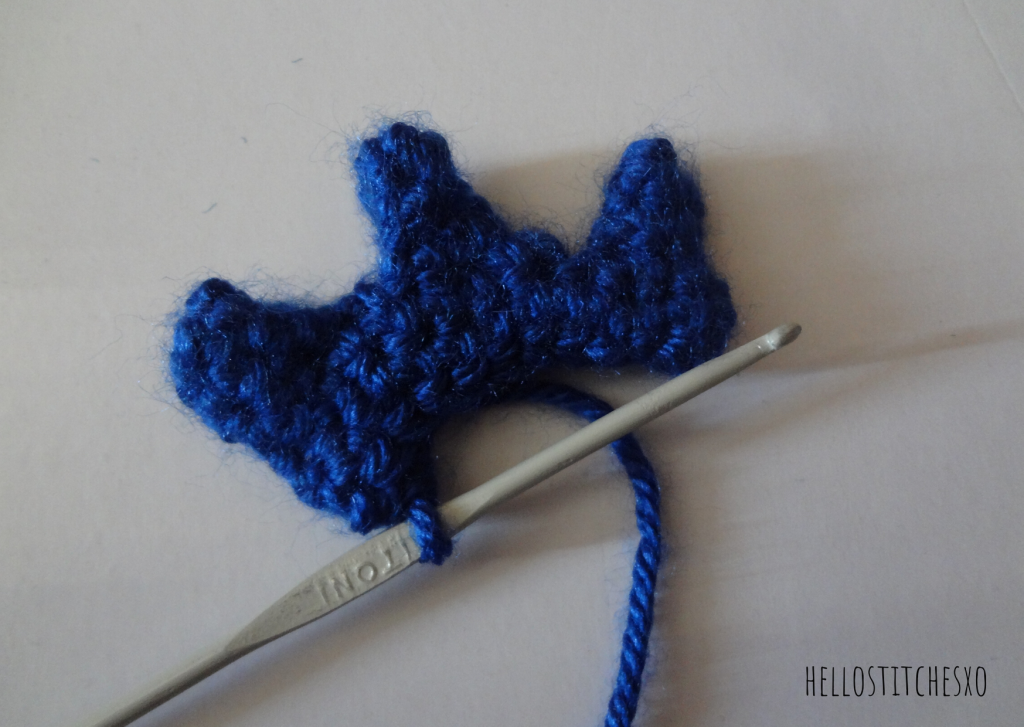
I will tell you what I did here to make his uneven tail. I made three triangles using the pattern below. And, I joined them all and continued to sc around them. Start crocheting using the dark blue yarn.
Round 1: Magic circle, 4sc around. (4)
Round 2: [sc, inc] * 2 times. (6)
Round 3: [sc, sc, inc] * 2 times. (8)
Round 4: sc around. (8)
Well, I can see that the triangles looks different when they are supposed to look the same. I must admit I may have skipped a few stitches to make it appear this way.
Round 1: Join all three cone shapes. (24)
Round 2: sc around. (24)
Round 3: sc around. (24)
Round 4: sc around. (24)
Round 5: sc around. (24)
Round 6: sc around. (24)
Round 7: [sc, sc, invdec] * 6 times. (18)
Round 8: sc around. (18)
Change to light blue yarn. sc around for another 9 rounds or till the length of tail you desire.
Bluey amigurumi ears
Round 1: Magic circle, 6sc. (6)
Round 2: [sc, sc, inc] * 2 times. (8)
Round 3: [sc, sc, sc, inc] * 2 times. (10)
Round 4: [sc, sc, sc, sc, inc] * 2 times. (12)
Round 5: [sc, sc, sc, sc, sc, inc] * 2 times. (14)
Round 6: [sc, sc, sc, sc, sc, sc, inc] * 2 times. (16)
Round 7: [sc, sc, sc, sc, sc, sc, sc, inc] * 2 times. (18)
Round 8: [sc, sc, sc, sc, sc, sc, sc, sc, inc] * 2 times. (20)
Round 9: [sc, sc, sc, sc, sc, sc, sc, sc, sc, inc] * 2 times. (22)
Round 10: [sc, sc, sc, sc, sc, sc, sc, sc, sc, sc, inc] * 2 times. (24)

Bluey’s nose
Chain 8
Round 1: Start sc from the second chain from the hook, 6sc, 3sc inc, 5sc, inc. (16)
Round 2: inc, 7sc, inc, 7sc. (18)
Round 3: 2 inc, 7sc, 2 inc, 7sc. (22)
Round 4: 3 inc, 8sc, 3 inc, 7sc. (28)
Round 5: sc around. (28)
Round 6: sc around. (28)
Round 7: sc around. (28)
Instead of attaching it like you would usual do, I rotated it and sewed it on.
Bluey’s eyebrows(Make two)
Round 1: Magic circle, 6sc. (6)
Round 2: sc around. (6)
sc around for the next 4 rounds.
Round 7: sc around. (6) Close and finish off.
Bluey’s eyes

Chain 5
Round 1: Start sc from the second chain from the hook, 3sc inc, 2sc, 3sc inc, 2sc. (10)
Make two more rounds of ovals with increases in the ends, like how we did for the base of the body. I used safety eyes for the eyeballs, you can also crochet them.

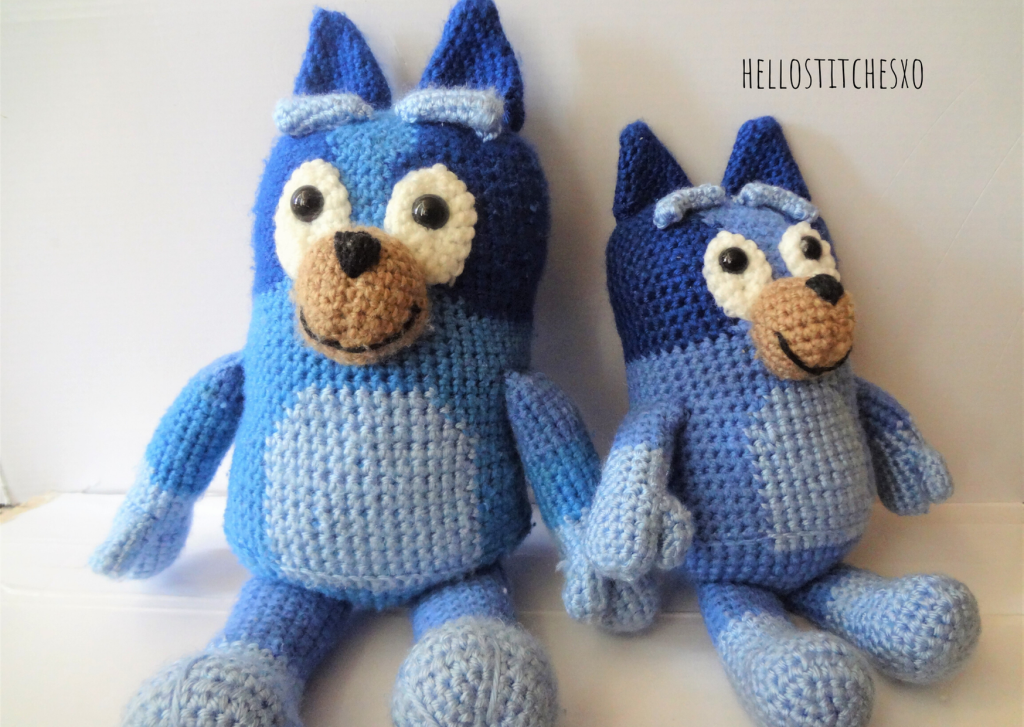
If you are interested in making a smaller version of this Bluey, or if you are looking for a pattern to make Bingo I’ve got it covered for you. Click the image below to get to that pattern.






Thank you so much for putting this up! I found your pattern on YouTube 🙂 our fav episode has to be the grannies one! My 2 year old loves bluey it’s the first show she has ever taken interest in.
Thank you so much for putting this up! I found your pattern on YouTube 🙂 our fav episode has to be the grannies one! My 2 year old loves bluey it’s the first show she has ever taken interest in.
Oh great, isn’t it a fun show Cass? My daughter is now obsessed with the show like I was. Thank you for writing back.
Divya
I’m starting on bluey body row 1 is it 3sc in 1 stitch or sc3 then 2sc
Thankyou my friend I was the one who asked you to do the video for my granddaughter xxx.
Thanks for these patterns, I’ve made 2 blueys and 1 bingo for the littlies around me who love the show! Would love to send a photo if you have an email address I can send to. Found great bingo colours in spotlight flinders and Brighton yarns, perfect match!
Oh wow! I cant go shopping now, but I will soon for some Bingo colors.
I’d love to see your Blueys. You can send them to hellostitchesxo@gmail.com. Have a good day. Stay safe.
Hey!
Great pattern but just wondering how many decrease rows you do to complete the body once the eyes are in place please?
Thanks!
Hello
I am making a Bingo. Very cute. I am confused with the nose. Is it worked in rows or rounds? How do I go from chain 8 to the next row?
Thanks
Mel
The Bluey’s nose is worked in rounds, making an oval for the nose.
Make a chain 8.
Start to crochet from the second chain from the hook,
Round 1: 6SC, 3SC inc in the last stitch,
Start to work on the other side of the chain,
5SC, 2SC inc in the last chain.
And continue along for the next few rounds, hope that helps. ?
Thank you.
Hi Mel,
The Bluey’s nose is worked in rounds, making an oval for the nose.
Make a chain 8.
Start to crochet from the second chain from the hook,
Round 1: 6SC, 3SC inc in the last stitch,
Start to work on the other side of the chain,
5SC, 2SC inc in the last chain.
And continue along for the next few rounds, hope that helps. 🙂
Thank you.
Thank you for the pattern! There aren’t many Bluey products in the USA yet & my daughter is in love with her new best friend!
So glad that you found it helpful 🙂
hello could you tell me how tall he is please
Just making your Bluey and I am wondering how many dec rows there are please? It’s not in the written instructions nor in the video?
Many thanks.
Hello, the pattern of Bingo where is? Thanks! ?
Hi,
Here’s is the pattern, I made it in Bluey colours because those were the yarn that I had in hand at the moment. Thank you.
http://hellostitchesxo.com.au/bluey-bingo-crochet-toy/
Hi there, love the pattern. I just need a little help with decrease within round 8. The last 3 rounds of the light blue decrease I don’t understand. Can you please write it for me? Thanks for a great pattern. 🙂 Kristy
Loving this pattern and it’s turning out great but it’s very confusing to finish off the body once you get the the decreases. How many rows do you do? The graph doesn’t show where you color change. Very frustrating. When do you add blueys spots? There’s no instructions on those.
Thank you for the feedback. I’ve worked on the graph and I have a written pattern for the body now. Hope it makes it easier to show where I’ve done the color changes. I’m still working on how to write a pattern on how I did the decreases, please bear with me while I make updates.
I am curious on how to “close off the eyebrows” and how to sew blueys spots on.
Loving the pattern so far. Thanks!
dear Taylor,
this is from the link pattern:
The decreases are done in the same order as we’ve done the increases. So, we’ll be doing 6 rounds of decreases, and then when we are left with just 24 stitches in the round, we’ll sl st it close.
I might be a bigger fan than my kids, but they love watching it too. I think our favorites so far are Daddy Robot and Bike. My kids asked for coloring pages, but then this pattern popped up too, and now I have to make one (or two) of these. Looking forward to it, and I’m happy to see other parents love this show!
Thank you so much for sharing this amazing pattern. My daughter adores Bluey but unfortunately we can’t get any Bluey toys in the U.K.
She was so delighted when I crocheted her this Bluey teddy. Thank you once again.
Oh no, where did the tapestry graph go? Lol I was working on the body just depending on the graph to know when to change color. I forgot what number row I am on! I can’t seem to find it anywhere. 🤷♀️
Sorry, a lovely reader pointed out that it had some mistakes and I had to take it out to correct it. Will upload it once I get to work on it. Meanwhile I hope the pattern helps. Sincerest apologies!
Hola, me gustaría saber de qué tamaño es Bluey y de qué tamaño queda Bingo. Gracias
I would like a knitted version because i can’t crochet.
Thanks for your lovely pattern! I really enjoyed making Bluey, especially as there is no Bluey merchandise for sale where I live.
I did add little triangles of the same colour wool as the nose to my Bluey’s ears. I thought I’d just write down the pattern here in case it was useful for anyone else.
Chain 6, Turn.
5sc, Chain 1, turn
Sc, sc2tog, 2sc, chain 1, turn
Sc, sc2tog, sc, chain 1, turn
Sc, sc2tog, chain 1, turn
Sc2tog, fasten off.
I stitched it to one side of the ear before I sewed the ears to the head.
Making Bingo next!
I am aware that your patterns are copyright, but I would like to know whether I may sell the finished article at the local market.
Thank you so much for this pattern. My little girl is 2 next week. She just loves Bluey. She’ll be over the moon with this toy
On your U tube video, you do not show how to finish off the head. Could you explain that to me please? You may email me if you would like. I am making Bluey for my great granddaughter who is obsessed. Thank you, Kay Miller
I appreciate the pattern that you posted but so much of it is missing like when to change color for the legs and arms and how many rows to crochet for each of these. I am not the most accomplished crocheter and want to finish this for my granddaughter. I’m having to create my own pattern and it is very frustrating. Not to be rude, but I would think you should make sure you have the whole pattern written down before posting.