
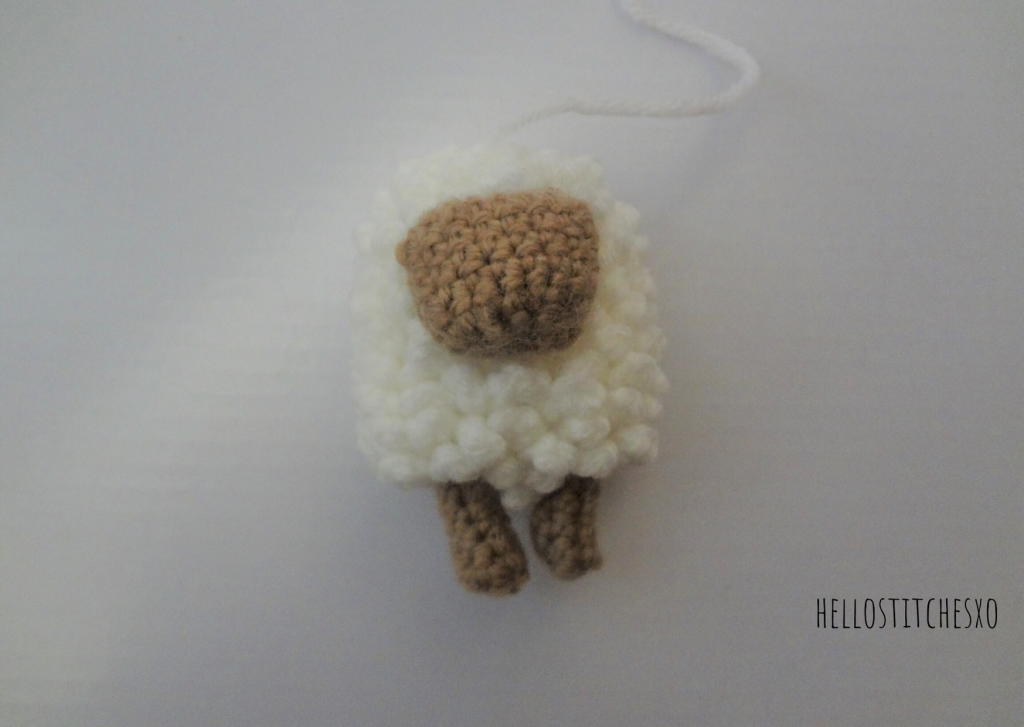
My first amigurumi project was a sheep, made using the puff stitch. Which, I thought looked unbelievably cute back then. Click here for some cringe worthy pictures of my first amigurumi. But yeah, I am glad that the first crochet brooch pattern that I’ve come up with is a sheep again.
Did you know about the recently trending amigurumi llama made using the fur stitch? I saw them on many Facebook groups and have been wanting to try them ever since.
Here’s my take on the fur stitch – a crochet brooch pattern to make a fluffy fat sheep. This crochet sheep brooch pattern can be adapted to make,
- bags, backpack pins
- brooch for clothes, jackets
- a fridge magnet
- used as an applique


Items you will need:
- White 8 ply acrylic yarn about 50gm.
- Brown 8 ply yarn.
- Safety pin
- Crochet hook: 2.00mm.
Video link to the pattern
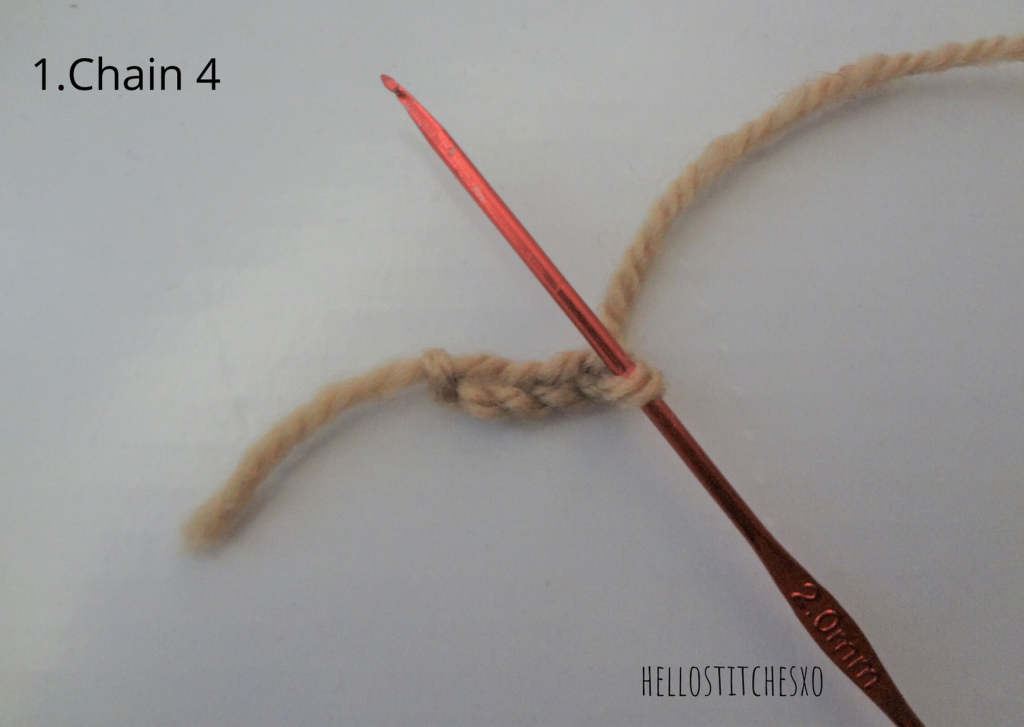
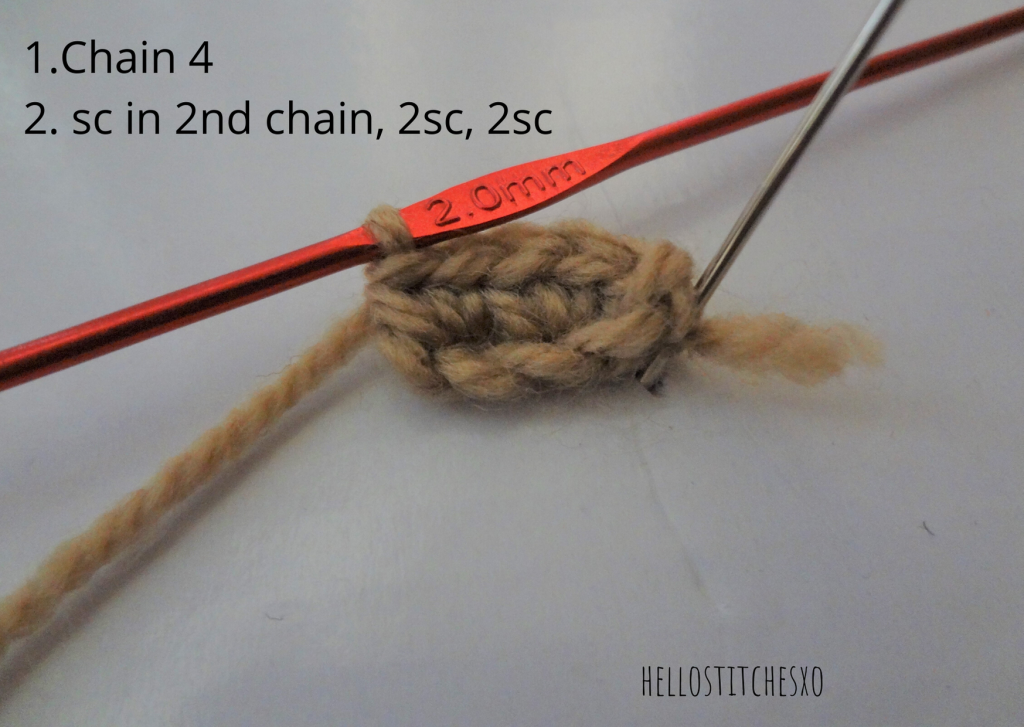
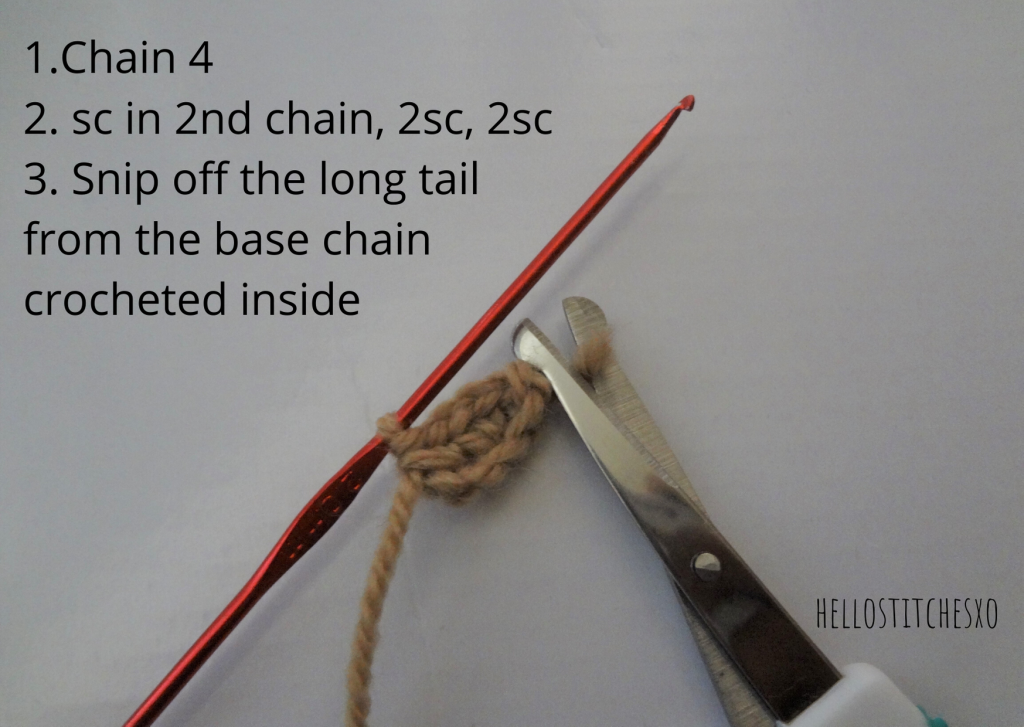
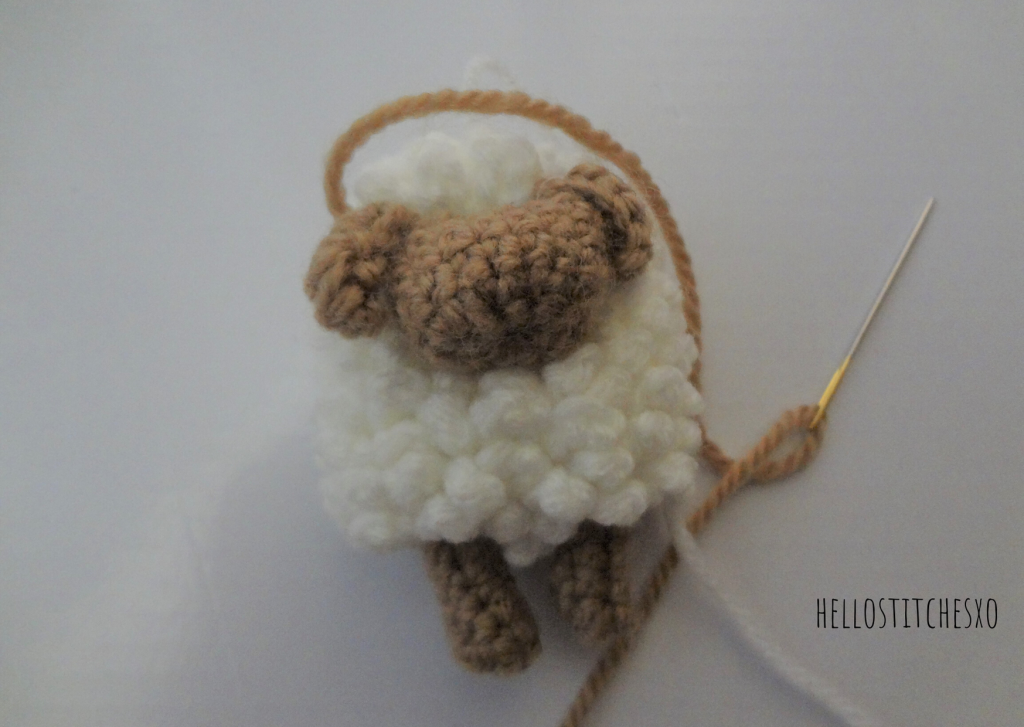
Crochet sheep brooch pattern
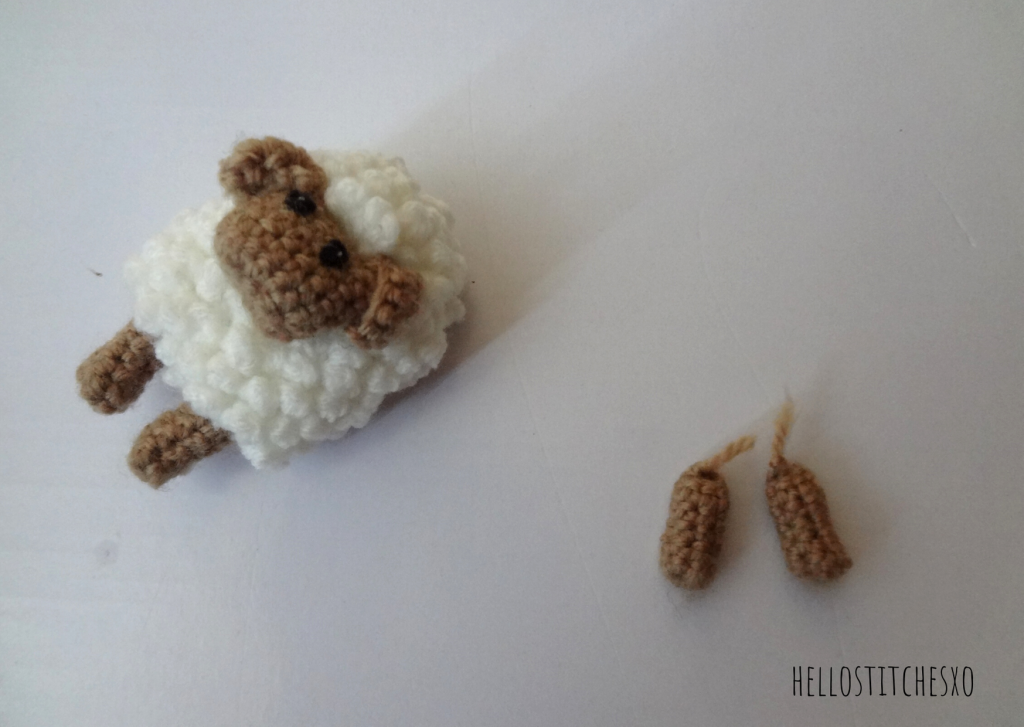
Start with crocheting the two legs with brown yarn and work your way upwards.
Legs:
- Magic Circle 6sc
- sc around. (6)
- sc around. (6)
- sc around. (6)
- sc around. (6)
Make two of these legs, and join them using a white colored yarn.
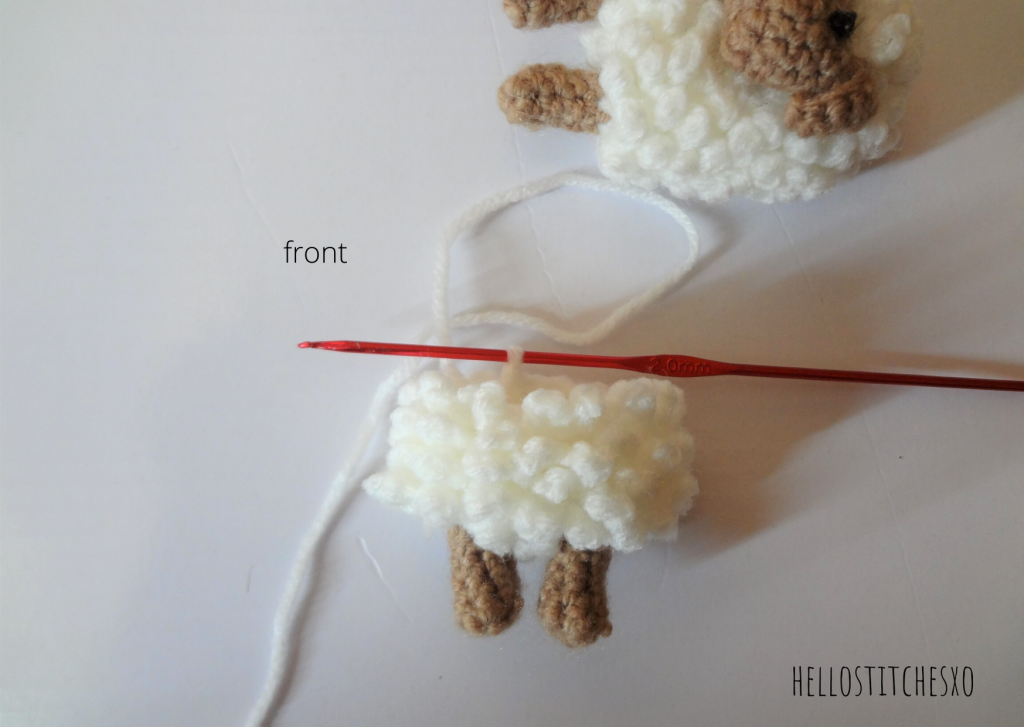
Body:
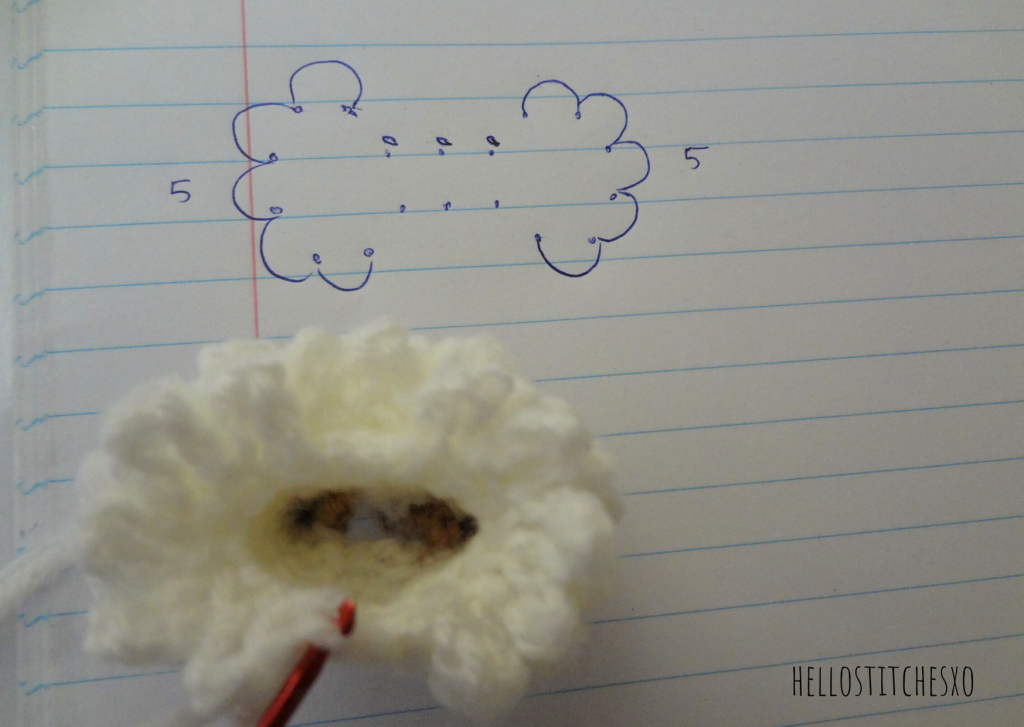
Round 1: sc around the first leg 6sc, chain 3, sc around the second leg 6sc, chain 3 and join the first leg.
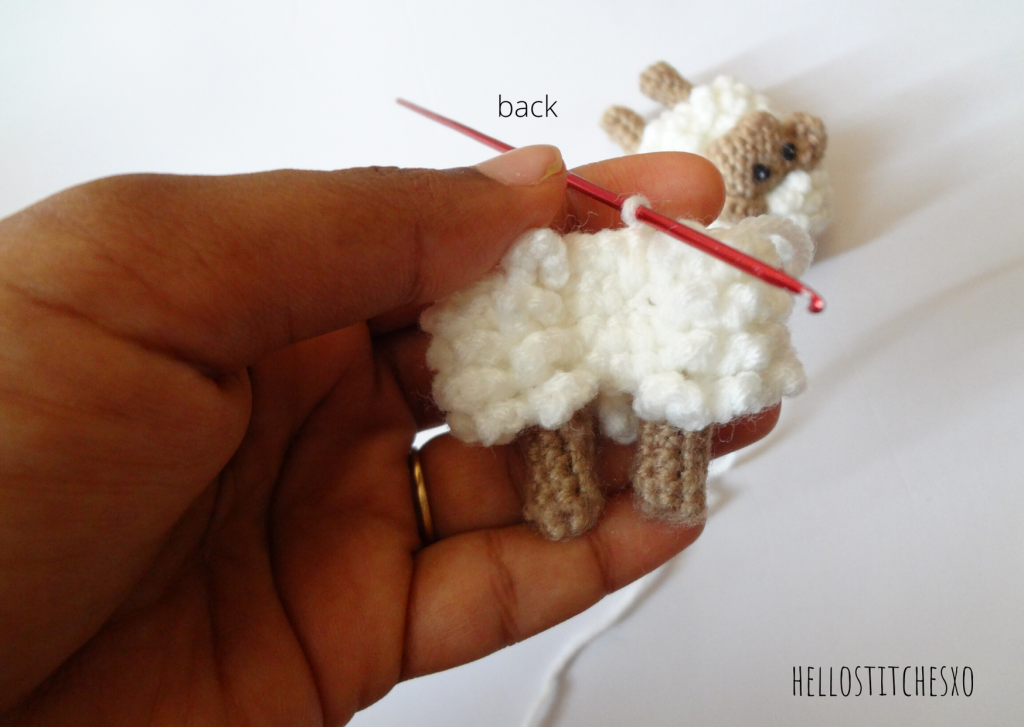
Note : We are now going to work the fur crochet stitch around the body. In order to leave space for the face and the pin that goes on the backside I have not done the fur stitch in those areas instead I have just sl st in them.
Round 2: Working in the front loops only[FLO], [sl st in the first st, chain 5, sl st into the next st] * 14 times making 14 loops around the body. sl st in the last 3 stitches(space where the pin goes).

Round 3: Working in the back loops[BLO],
sc around. (18)
Repeat steps 2 & 3 for another 3 times till you reach round 9. In the end, you have four rounds of fur around the sheep’s body.
Round 10: [FLO], [sl st in the first st, chain 5, sl st into the next st] * 5 times making 5 loops on one side. sl st in the next 3(allowing a small space in the front for the head), [sl st in the first st, chain 5, sl st into the next st] * 5 times making 5 loops on the other side, sl sl in the last 3.
Round 11: [BLO],
sc around. (18)
Round 12: [FLO], [sl st in the first st, chain 5, sl st into the next st] * 5 times making 5 loops on one side. sl st in the next 3(allowing a small space in the front for the head), [sl st in the first st, chain 5, sl st into the next st] * 5 times making 5 loops on the other side, sl sl in the last 3.
Round 13: [BLO],
sc around. (18)
Round 14: [FLO], [sl st in the first st, chain 5, sl st into the next st] * 5 times making 5 loops on one side. sl st in the next 3(allowing a small space in the front for the head), [sl st in the first st, chain 5, sl st into the next st] * 8 times making 8 loops. (You dont need to leave any more space for the pin. Also, we only have 8 loops because we are not joining the last loop with the first one.)
Round 15: [BLO],
sc around. (18)
Round 16: [FLO], [sl st in the first st, chain 5, sl st into the next st] * 17 times making 17 loops around.
Start working the decreases from this round.
Round 17: [BLO],
[sc, dec] * 6 times. (12)
Round 18: [FLO], [sl st in the first st, chain 5, sl st into the next st] * 11 times making 11 loops around.
Round 19: [BLO],
dec * 6 times. (6)
Round 20: [FLO], [sl st in the first st, chain 5, sl st into the next st] * 5 times making 5 loops around.
You can choose to sew the top close or leave it as it is because the opening is not going to be much visible anyway.
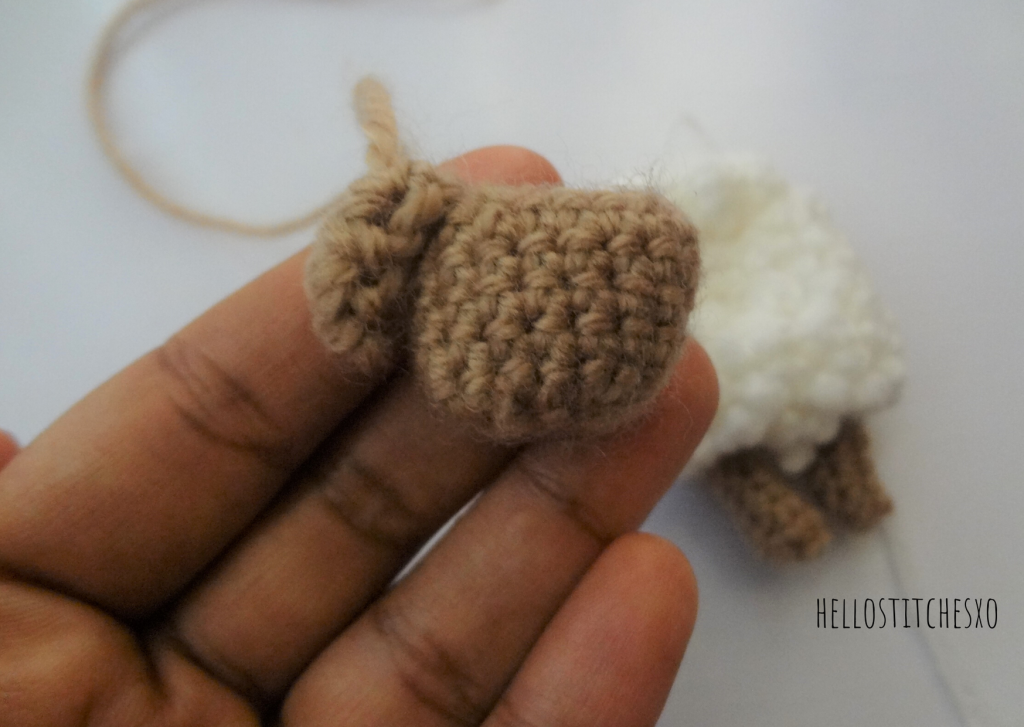
Head
- Magic circle, 8sc around. (8)
- 2sc in each st around. (16)
- sc around. (16)
- sc around. (16)
- sc around. (16)
- sc around. (16)
Ears
Then sew those two ears to the head.


Such a cute little sheep, thank you for sharing.
Pls, do a video. I couldn’t follow the instructions 🙁
I am going to, just not sure when. Thanks! 🙂